BBMAP is a set of PHP pages (mainly) that tend to give a status map capacity to Big Brother.
Currently version V2.4 (11/12/2003) for BigBrother and V2.5 (27/11/2006)
for Hobbit.
SCREENSHOTS
HOWTO CREATE MAPS
SCREENSHOTS
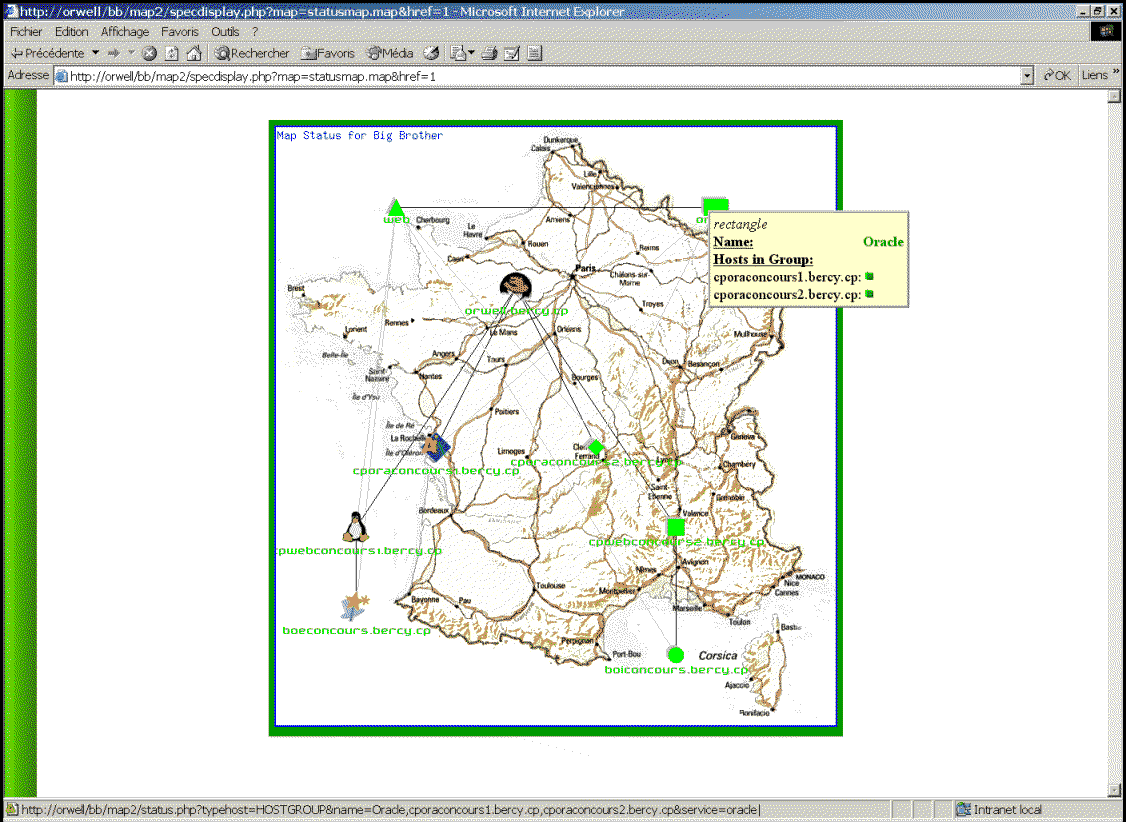
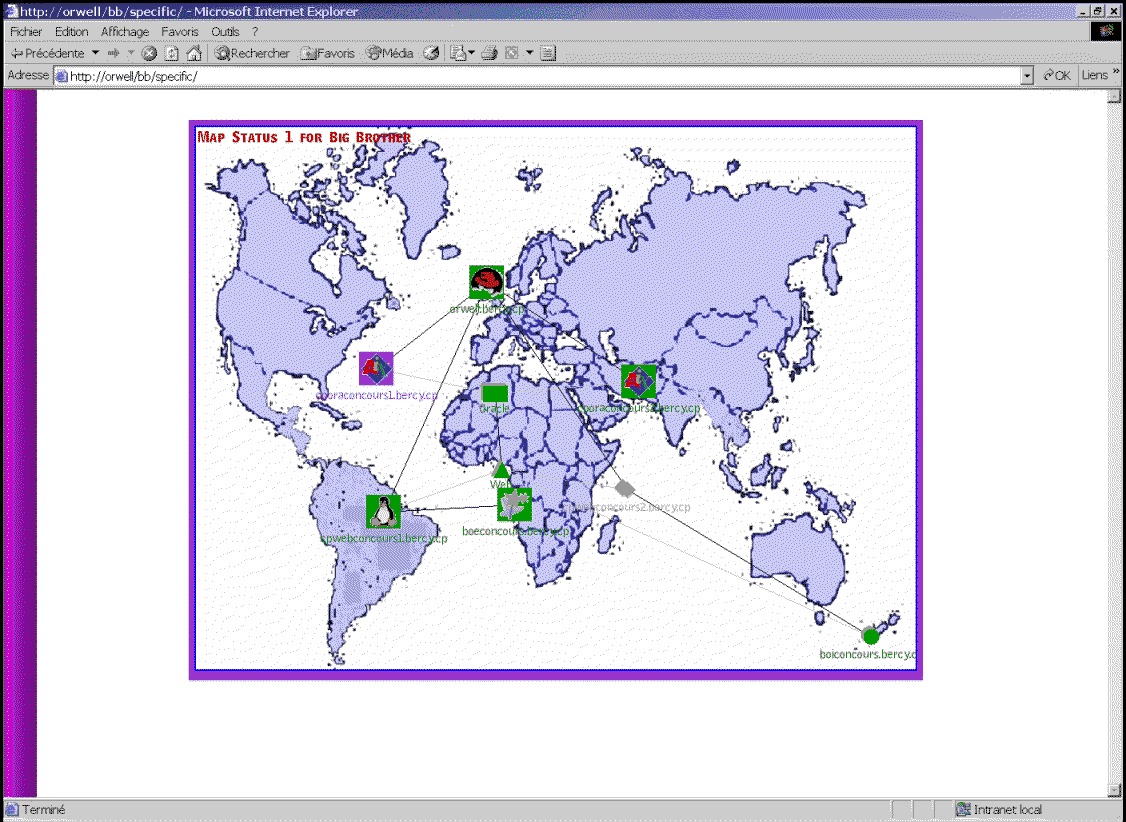
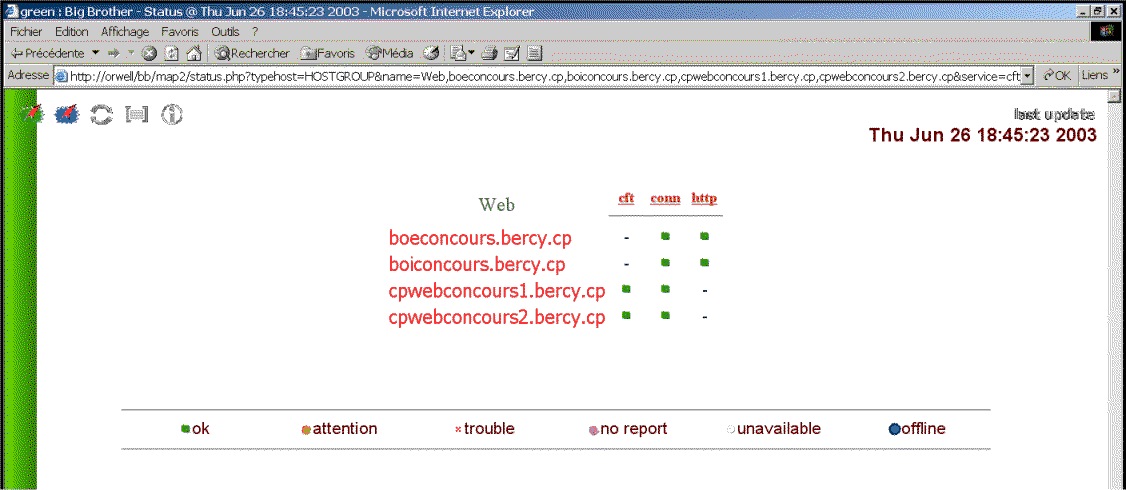
OK, before to go deeper inside the technical points, install and so on, just some picture to get an idea (click on them to get them bigger).
|
BB Status MAP User Point of Vue
|
|
|
|
|
|
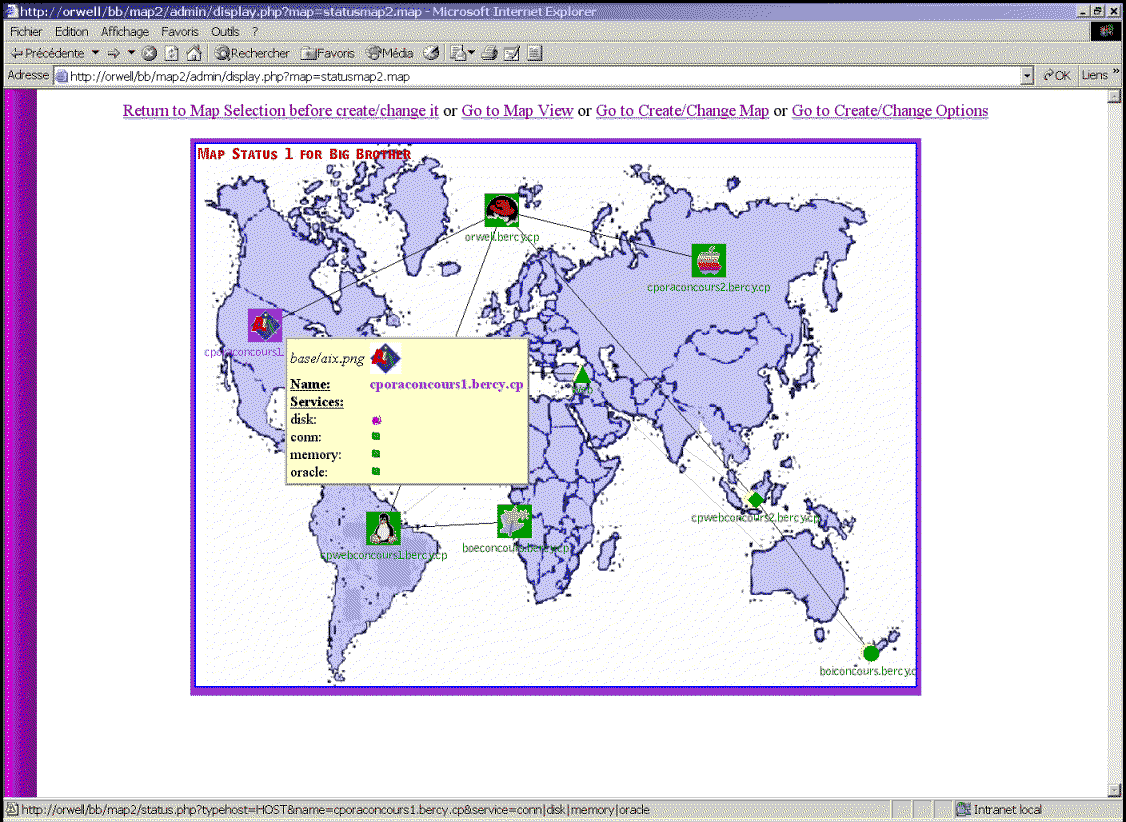
BB Status MAP Admin Point of Vue
|
|
|
|
|
|
|
|
|
HOWTO CREATE MAPS
-
Create an empty map file (with only "SERVICES = none" inside or at least copy an previously existant map file but removing all HOST, HOSTGROUP and SUBMAP lines inside).
-
Select with bbmap/admin/selectmap.php the new empty map file in "Map for Option" menu.
-
Now set the specific values you want: Note that you must Validate for
EACH Option Group if you make a change (so change only values in one Option group at a time).
-
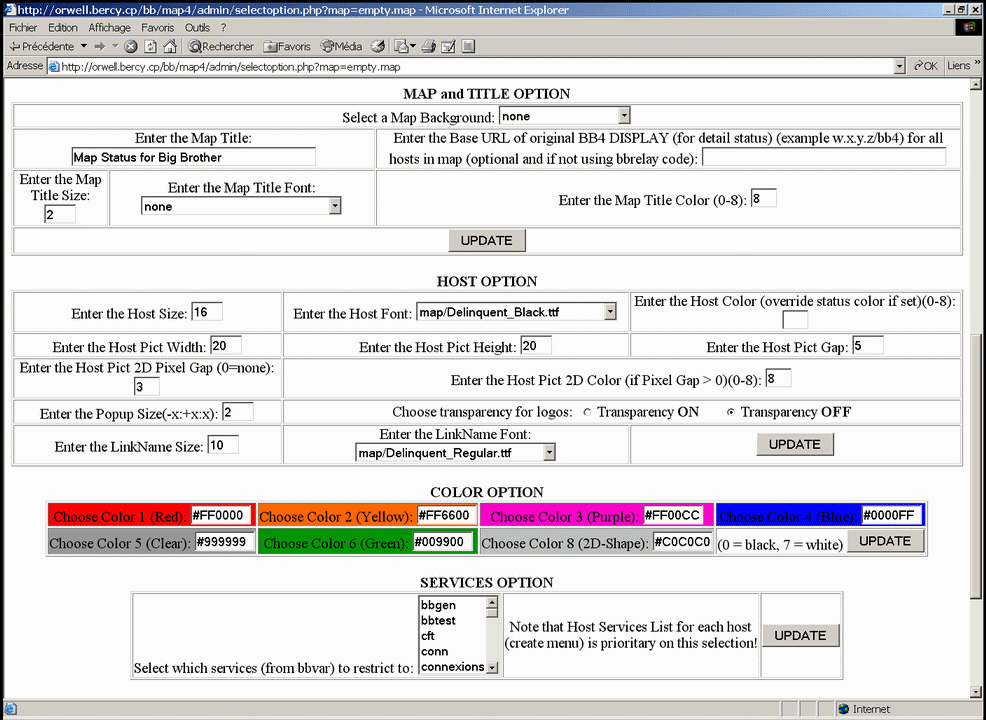
MAP and Title Option:
-
Map Background : the picture file you want to use as background (% = none)
-
Map Title : the Map Title displays in top left corner
- Base URL : Base URL of the original BBDISPLAY (if different
than BBMAP host) if you're not using BBRELAY functions. Most
of the users do not neet to set any value here.
-
Map Title Size : the size (in inch) of the title text
-
Map Title Font : the specific font file (TTF) used for the title text
-
Map Title Color : from 0 to 8 (reports yourself to the color section)
-
HOST Option:
-
Host Size: the size of the hostname size
-
Host Font: the specific font file (TTF) used for the hostname text
-
Host Color: if you specify a color here (0-8), then all hostnames will always appear with this color. If not, the color will depend on the status of the host,
hostgroup, submap...
-
Host Pict Width: Size for the picture (except for picture file, only for circle, diamond, ...)
-
Host Pict Height: Same (only for circle, diamond, ...)
-
Host Pict Gap: How many pixel between the picture and the hostname text
-
Host Pict 2D Pixel Gap: If not 0, enable a 2D aspect on the map for the pictures
-
Host Pict 2D Color: If Pixel Gap not 0, defined the default color (0-8) for the 2D aspect
-
Popup Text Size: The size (2 default, but can be +x or -x or x) of the java detailed popup
-
Transparency: If set, picture from picture file (PNG), will have a possible (?) transparency and get the color from the status
- Link Name Size and Link Name Font : size anf font for the linkname
you can put on the map between host and parent (if set)
-
Colors Option:
-
For each colors, you should better use the java menu and select the color you want for each status.
-
0 = Black (unmodified), 7 = White (unmodified)
-
1 = Red, 2 = Yellow, 3 = Purple, 4 = Blue, 5 = Gray (blank
status), 6 = Green, 8 = Any color (generally for 2D aspect)
-
Services Option:
-
You select (CTRL pressed) the default services list you
want assigned to a HOST or HOSTGROUP. Note that if you specified
later on a specific list of services for a HOST or HOSTGROUP
in the Create Map Menu, this specific list will override the
default list for this HOST or HOSTGROUP only.
Submap are not concerned.
-
HOSTLIST Option:
-
You Add or Remove specific HOST, SUBMAP or HOSTGROUP
that you want to be able to add or remove in the Create Map Menu
later on. Note that this option is the only way to add a new
HOSTGROUP ! (or go directly in the text.map or bbmap/admin/hostlist.cfg
files)
-
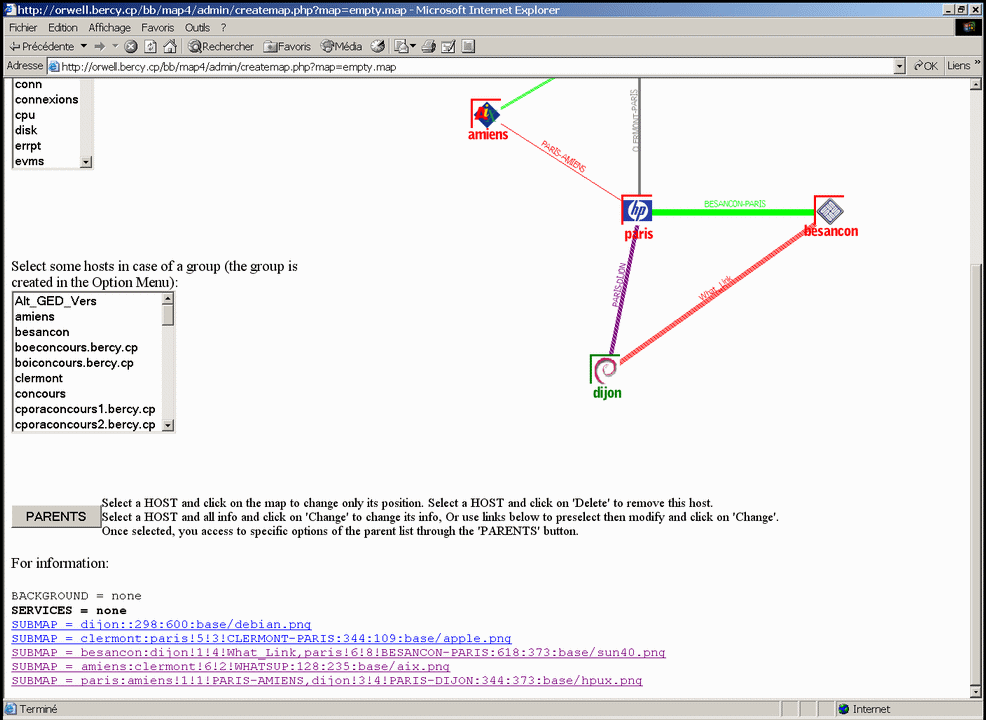
Now Use the Create Map Menu link in the top menu
-
Always select first the Host, Hosgroup or Submap name you want to change/add/delete.
Two ways to do that :
- select in the Host HTML selector the name you want
- or, if the host is already defined in the map, you can click in
the bottom information list on the web link. It will take you back to
the same screen with all previous options selected (so that you can
easily modify them).
-
If the action wanted is to Delete this Host/Submap/Hostgroup
from the map, then just click now the Delete Button
-
If the action wanted is to Change the options (services, parents,
shape, group), then change as desired and click now the Change
Button: this action was added to permit to only change for instance
the shape without moving the host on the map (used jointly with
the previous noticed web link)
-
If the action is to Add a Host/Submap/Hostgroup, then Select the Parent Host(s) (link between them
- Ctrl Pressed - ) or nothing if no parent desired
-
Select a Shape (circle, diamond, ... or a picture file)
-
If you are OK with the default services list (defined in the previous menu, and you can see it again in the bottom of this screen since the Map file is partially
displayed below "For Information"), then don't select any services. If not, select all the services you want to check for this host (CTRL Pressed)
(the selection done will be mandatory on the default one)
-
If this is a HOSTGROUP, you MUST select some hosts in the list to be part of this HOSTGROUP list
-
Now you can click on the map to put where you want this new Host/Hostgroup/Submap
-
After clicked, the previous selection is still valid in order to allow you to easily change the map position of this node.
-
Note that, except when the node is new (added), clicking on the
map with only the hostname selected is enough since only the
position will be changed, not any of the other options (as parents,
picture and so on).
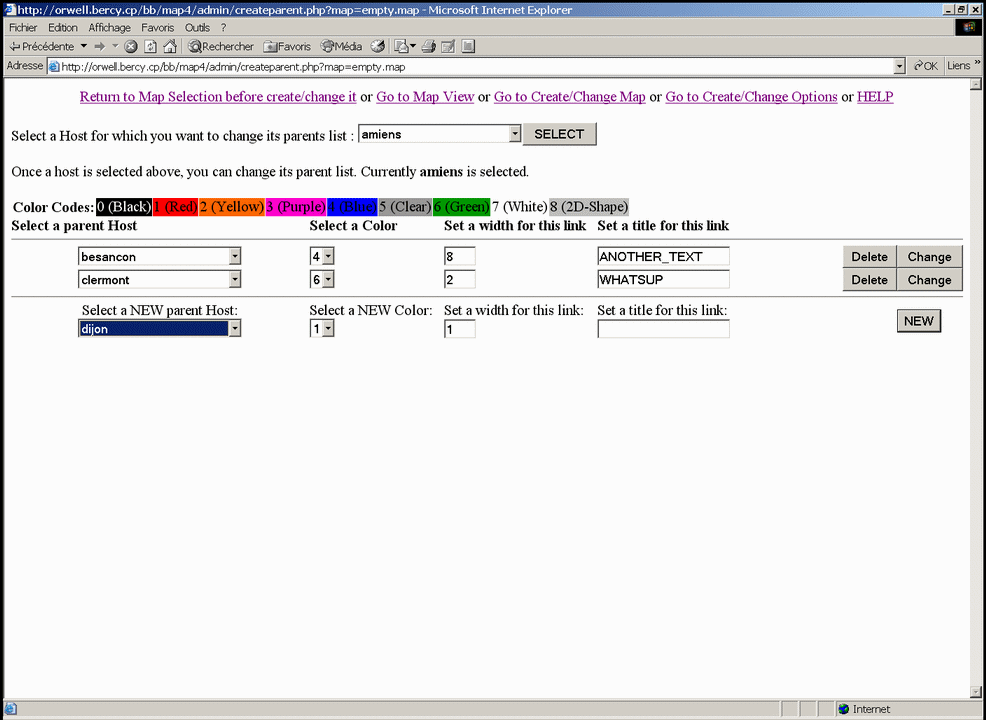
- You can specify more options on link between host and parents
by using the PARENTS button; then for each parent, you can set
the color of the link, the size of the link itself and a title
(the font and the size of the text is defined globally for the
map in the Option Menu).
-
You've done! Go to Map View to see if the result is OK.
-
Of course you can create a specific directory (as bbmap/subpage) with a specific index.php in order to make specific right access, restriction or whatever...
Take care to put access user and password in the globalmap.cfg file
in order to enable access to the submap!